WordPress SEO page speed optimization is one of the technical improvements I always put first because it can improve two things at once: how search engines evaluate a site and how fast a real visitor can use it. A slow WordPress website can make readers wait for content, increase frustration and create issues with Core Web Vitals. The good news is you typically don’t have to be a developer to make meaningful improvements. With the right diagnosis, image optimization, caching, css and JavaScript settings, and a lean WordPress setup, you can often make a noticeable difference.
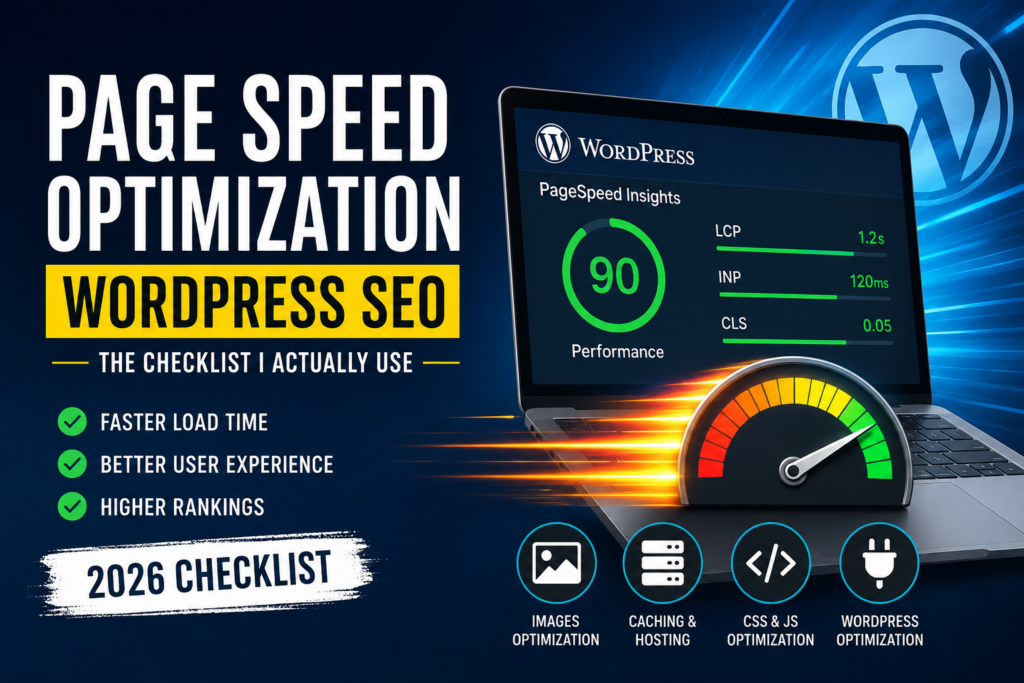
The key here is not to chase a perfect PageSpeed score blindly. I see speed optimization as a process: Measure, find the biggest bottleneck, make one change, test again, and keep the changes that actually improve the experience.
Here’s the WordPress SEO checklist I use for page speed optimization to approach that process.
Why Page Speed Matters for SEO in 2026
The reason page speed matters is that it has a direct impact on user experience and is intrinsically linked to Google’s Core Web Vitals.
Currently, Google has three Core Web Vitals:
- LCP (Largest Contentful Paint): loading performance
- INP (Interaction to Next Paint): responsiveness
- CLS (Cumulative Layout Shift): visual stability
Google recommends a good user experience to have an LCP of 2.5 seconds or less, an INP of less than 200 milliseconds, and a CLS score of less than 0.1.
Here, page speed optimization is more than a technical exercise.
Let’s say two websites publish equally useful articles. One loads its main content quickly on a mobile connection. The other takes several seconds before the headline, featured image and main content settle into place.
The second site adds unnecessary friction before the visitor even starts reading.
Google also recommends good Core Web Vitals for Search success, but these are just one of many signals in Google’s overall ranking systems.
So I don’t hit speed like:
“Get a 90+ score, as Google loves green.”
I look at it as:
“Ensure that critical content loads fast and the page is responsive and stable.”
That difference is important when you start optimizing WordPress.
Step 1: Diagnose Your Current Speed Before Fixing Anything
The first rule in my checklist is simple:
Don’t optimize a problem you haven’t measured.
Before installing another plugin or changing settings, test the site.
1. Run the page through PageSpeed Insights
Start with the Google Page Speed Insight.
Both lab data and real-world field data are available. Lab data is from Lighthouse and is helpful in diagnosing specific problems, field data is from real users in the Chrome User Experience Report when there is enough data.
Run test for:
- Homepage
- A typical blog post
- A category page
- Any important landing page
- Your most important traffic-generating pages
Test the home page and more.
A homepage may be fast, but a blog template full of ads, related posts, social embeds and big images is a lot slower.
2. Check mobile separately
Mobile should be your first concern.
A page that loads quickly on your office desktop with a decent internet connection may be a very different experience on a mid-range phone and a slower network.
Special attention should be paid to:
- LCP
- INP
- CLS
- TTFB
- Render-blocking resources
- Image delivery
- JavaScript execution
3. Check Google Search Console
Then, open the Google Search Console Core Web Vitals report.
In Search Console, the Core Web Vitals report uses real-world usage data, which gives you insight into how your pages are really performing for actual users, instead of relying on a single lab test.
This is one of the most important points to understand:
PageSpeed Insights tells you what happened during a test. Search Console helps you understand patterns across real users and pages.
If you notice a cluster of URLs with similar performance problems in Search Console, fix the underlying template or site-wide issue instead of optimizing each URL individually.
4. Use GTmetrix for deeper diagnosis
GTmetrix is useful if you want a different view of page loading.
Search for:
- Large requests
- Slow resources
- Excessive JavaScript
- CSS files
- Third-party requests
- Images consuming significant bandwidth
- Long request chains
I don’t see one tool as the absolute truth.
I look at the patterns.
If PageSpeed Insights, Search Console and GTmetrix all say big images and slow server response, that’s a much better indication than one single score.
Diagnosis checklist
- Test the homepage
- Test at least one representative blog post
- Test mobile and desktop
- Record LCP, INP, CLS and TTFB
- Check PageSpeed Insights field data
- Check Search Console Core Web Vitals
- Review GTmetrix for request-level problems
- Identify the biggest bottleneck before changing settings
For more on technical diagnosis, connect this post to your technical SEO audit tools article.
Fix Category 1: Optimize Your WordPress Images
Images are often one of the easiest places to find performance improvements.
A blog might have great hosting and caching, but it will still load slowly if the featured image is a 2 MB PNG or the page has ten unnecessarily large photos.
5. Convert images to WebP
For most WordPress content sites, WebP is a reasonable next-generation image format.
The idea isn’t to upload a WebP just because it’s newer. The goal is to minimize the amount of data that has to be downloaded by the visitor while keeping the visual quality acceptable.
There’s plugins like LiteSpeed Cache that can improve images and produce WebP or AVIF versions.
6. Compress images before or during upload
You can use plugins such as:
- ShortPixel
- Imagify
- LiteSpeed Cache’s image optimization
Avoid installing multiple systems for image optimization that process the same images.
For example, if LiteSpeed Cache is handling image optimization, I wouldn’t install another plugin that aggressively optimizes the same files.
LiteSpeed specifically warns against pairing their image optimization with another image optimization plugin, as this can lead to processing problems.
Choose one.
7. Use the correct image dimensions
Why post a 3000 × 2000 pixel image when your content area is going to display it at 800 × 500?
WordPress can create different image sizes, but you should still start with source images that are the correct size.
For blog posts I usually check:
- Featured image dimensions
- In-content image dimensions
- Thumbnail sizes
- Mobile display size
8. Don’t lazy-load your LCP image
Lazy loading is helpful for images further down the page.
But you have a problem if your largest above-the-fold image is also your LCP element and you’re blindly lazy-loading everything.
The visitor shouldn’t have to scroll down to an image before the browser decides to load it.
For example, LiteSpeed Cache allows you to exclude images from lazy loading and provides a Viewport Image feature that gives priority to images that are visible in the initial viewport.
So my rule is this:
Lazy-load below-the-fold images, but make sure important above-the-fold content can load immediately.
9. Add explicit image dimensions
Give your images a width and height so the browser knows how much space to reserve.
This prevents unexpected movement when the image finishes loading.
That is important for CLS.
Image checklist
- Compress large images
- Use WebP where appropriate
- Use responsive image sizes
- Avoid unnecessarily huge source images
- Lazy-load below-the-fold images
- Don’t blindly lazy-load the LCP image
- Set image dimensions
- Optimize featured images
- Use only one image optimization system
Fix Category 2: Improve Server Response, Caching and Hosting
Sometimes it’s not an image that’s slowing down your WordPress site.
The server itself may be responding too slowly.
This is where TTFB is important.
10. Enable page caching
Every visitor needs WordPress so they can create the page from scratch, which is additional work for your server.
Caching makes it possible to serve pages and other frequently requested resources more efficiently.
WordPress has many standard options, like:
- LiteSpeed Cache
- WP Rocket
- Hosting-level caching
LiteSpeed Cache has page caching, browser caching, database optimization, CSS/JS optimization, and other performance features, but you need a LiteSpeed server to use its full-page caching.
If you’re on LiteSpeed hosting, you’ll obviously want to try out LiteSpeed Cache.
WP Rocket or your host’s caching solution might be a better fit if your host uses another server technology.
11. Improve TTFB
TTFB, or Time to First Byte, is the speed at which the server begins to respond.
TTFB is always bad? Don’t start minifying all your CSS files right away.
The issue might be:
- Slow hosting
- Server overload
- Poor caching
- Too many database queries
- Heavy plugins
- Poorly optimized WordPress configuration
- High server latency
If you’ve optimized the front end and TTFB is still poor, ask your host to investigate the server response time.
This is one instance where adding another plugin is not necessarily the answer.
12. Use a CDN
A CDN can deliver cached resources from infrastructure closer to the visitor.
Cloudflare’s CDN caches static resources like images, CSS, and Javascript across their distributed network, reducing the distance between your visitors and the cached content.
Cloudflare is a nice addition to the typical WP blog, especially if you have a geographically dispersed audience.
Content delivery doesn’t have to be an expensive CDN setup to be useful.
Server and caching checklist
- Enable reliable page caching
- Check whether your host supports LiteSpeed
- Avoid running multiple competing cache plugins
- Check TTFB
- Ask your host about consistently slow server response
- Use a CDN where appropriate
- Configure browser caching
- Purge caches after major optimization changes
Fix Category 3: Optimize CSS and JavaScript
This is where WordPress speed optimization can be messed up.
One click on the button “Optimize Everything” can break menus, forms, sliders, layouts or tracking.
I like gradual change.
13. Minify CSS and JavaScript
Minification strips out unnecessary characters from CSS and JavaScript files.
this can reduce the size of files, but the site makes a difference.
If you have a caching plugin that does minification, don’t use the same feature in another plugin.
14. Defer non-critical JavaScript
JavaScript does not always need to run before the main content is visible.
By deferring non-essential scripts, important page content can be made available sooner.
But don’t just assume all the JavaScript files need a delay.
Important scripts may control:
- Navigation
- Forms
- Menus
- Interactive elements
- Analytics
- Ecommerce functionality
Test after every major change.
15. Reduce render-blocking resources
CSS and JavaScript, which must load before the browser can render important page content can block the visible page.
Your optimization plugin might allow you to choose things such as:
- Remove unused CSS
- Load CSS asynchronously
- Defer JavaScript
- Delay JavaScript execution
- Minify CSS
- Minify JavaScript
Start with one change at a time.
Then test the page.
16. Be careful with third-party scripts
Third-party tools can quietly become major performance problems.
Examples include:
- Chat widgets
- Social media embeds
- Advertising scripts
- Heatmaps
- Tracking tools
- Video embeds
- External fonts
- Marketing platforms
Ask yourself:
Does this script genuinely contribute enough value to justify its performance cost?
If not, remove it.
CSS and JavaScript checklist
- Minify CSS
- Minify JavaScript
- Defer non-critical JavaScript
- Delay unnecessary scripts where appropriate
- Reduce render-blocking resources
- Remove unused CSS where your setup supports it
- Audit third-party scripts
- Test menus, forms and interactive features after changes
Fix Category 4: WordPress-Specific Cleanup
WordPress makes publishing easy, but plugins and themes can gradually make a site heavier.
17. Remove unnecessary plugins
Don’t judge a plugin by its size alone.
A small plugin can still do database queries or load assets all over your site.
Look at your plugins, and ask yourself:
- Do I still need this?
- Is another plugin already providing this function?
- Does it load assets site-wide?
- Is the feature worth its performance cost?
If you don’t need it, remove it.
18. Avoid duplicate functionality
Installing multiple plugins that do similar things is one of the most common WordPress performance mistakes.
For example:
- Two caching plugins
- Two image optimization plugins
- Multiple SEO plugins
- Multiple lazy-loading systems
- Several security plugins performing overlapping tasks
More plugins don’t always mean a slower website, but overlapping redundant functionality increases the risk of conflicts and additional processing.
19. Keep the theme lean
Your theme is responsible for much of the front-end experience.
If your theme loads unnecessary sliders, animations, icon libraries, page-builder features or scripts on every page, those assets can add to performance issues.
You don’t always have to change the theme.
First, disable features you are not using.
20. Clean the WordPress database
WordPress databases can grow over time:
- Post revisions
- Auto-drafts
- Spam comments
- Trashed content
- Expired transients
- Other unnecessary records
Database cleanup can help you keep WordPress organized, but before you go on an aggressive deleting spree of database tables and records you don’t recognize, be sure to back up first.
Ask your host or developer before cleaning anything you are not sure of.
WordPress cleanup checklist
- Remove unused plugins
- Remove duplicate functionality
- Disable unnecessary theme features
- Review page-builder features
- Clean unnecessary database data
- Take a backup before major cleanup
- Test the site after every major change
My Recommended WordPress Speed Plugin Stack
I don’t recommend installing every performance plugin you can find.
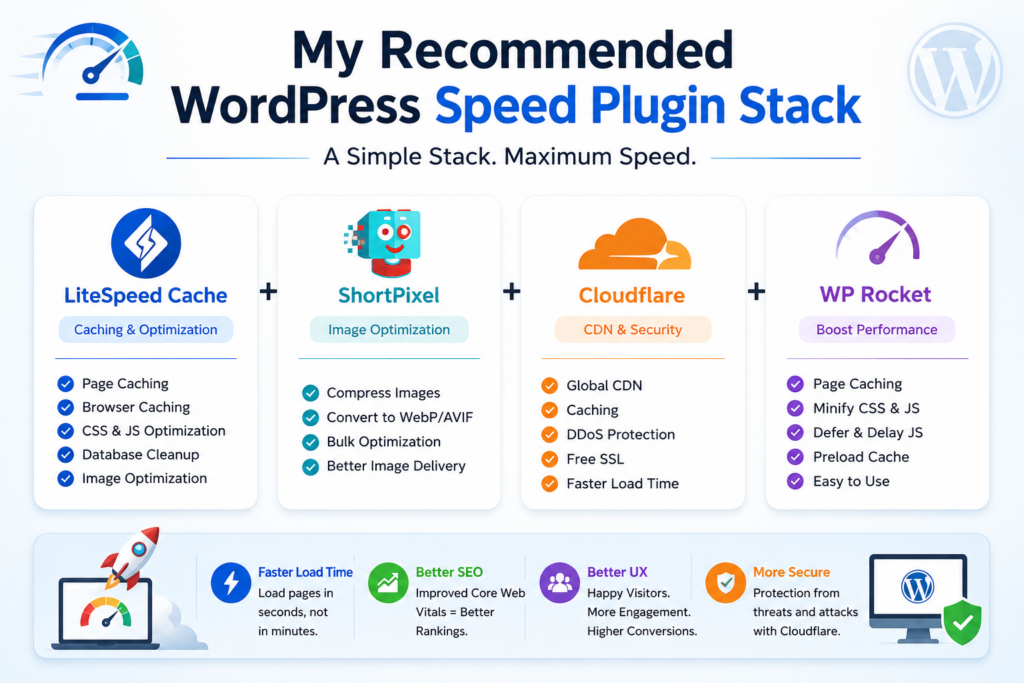
A better approach is to build a small stack where each tool has a clear job.
Option 1: LiteSpeed setup
If your hosting uses LiteSpeed, my preferred starting point is:
LiteSpeed Cache + Cloudflare + one image optimization solution
LiteSpeed Cache already includes caching, image optimization and CSS/JavaScript optimization capabilities.
That means you should be careful about adding separate plugins that duplicate those functions.
Option 2: WP Rocket setup
If your host isn’t running LiteSpeed, WP Rocket is another well-known WordPress performance option.
The important principle is the same:
Use one primary caching/optimization plugin instead of stacking several competing systems.
Where ShortPixel or Imagify fits
If your caching plugin isn’t handling image optimization, you can use a dedicated image optimizer such as ShortPixel or Imagify.
For example:
WP Rocket + ShortPixel + Cloudflare
can make sense when each tool has a distinct role.
But I would avoid:
LiteSpeed Cache + ShortPixel + another image optimizer
all processing the same images.
My simple decision rule
| Hosting setup | Starting point |
| LiteSpeed server | LiteSpeed Cache |
| Non-LiteSpeed WordPress hosting | WP Rocket or host caching |
| Need dedicated image optimization | ShortPixel or Imagify |
| Need CDN | Cloudflare |
| Multiple optimization plugins | Avoid overlapping features |
What a Realistic Speed Improvement Looks Like
This is where I think many speed guides become unrealistic.
You may see screenshots showing a WordPress website going from 40 to 95 in one optimization session.
It can happen.
But it isn’t guaranteed.
A website with:
- Lightweight theme
- Optimized images
- Good hosting
- Minimal plugins
- Efficient caching
- Few third-party scripts
may improve dramatically with a handful of changes.
A website with:
- Cheap or overloaded hosting
- Heavy page builder
- Large images
- Many plugins
- Advertising
- Tracking scripts
- Multiple external resources
It might take a lot more work.
And sometimes a 78 can be a perfectly reasonable real-world experience, and chasing 95 is more risk than reward.
I would rank improvements like this:
1. Fix poor Core Web Vitals
2. Improve LCP
3. Reduce server response time
4. Optimize large images
5. Remove unnecessary JavaScript
6. Improve caching
7. Clean up WordPress bloat
8. Then worry about squeezing the last few points from the lab score
Notice that the lab score from PageSpeed Insights is an approximation of performance and the field data is from real users. A green lab score does not automatically mean every visitor has a fast website.
My Page Speed Optimization WordPress SEO Checklist
If I was starting out optimizing a WordPress site, here’s the order I’d do it in:
- Run PageSpeed Insights before making changes
- Check Search Console Core Web Vitals
- Test mobile separately
- Record LCP, INP, CLS and TTFB
- Identify the biggest bottleneck
- Compress large images
- Convert suitable images to WebP
- Use correct image dimensions
- Lazy-load below-the-fold images
- Protect important above-the-fold/LCP images from lazy loading
- Enable page caching
- Check hosting and TTFB
- Add Cloudflare or another suitable CDN
- Minify CSS and JavaScript
- Defer non-critical JavaScript
- Reduce render-blocking resources
- Remove unnecessary third-party scripts
- Remove unused WordPress plugins
- Remove duplicate plugin functionality
- Disable unnecessary theme features
- Clean the database carefully
- Test after each major change
- Re-run PageSpeed Insights
- Monitor Search Console rather than relying only on the lab score
How This Connects to Core Web Vitals
Think of the relationship between these two posts this way:
Core Web Vitals explains what you need to measure.
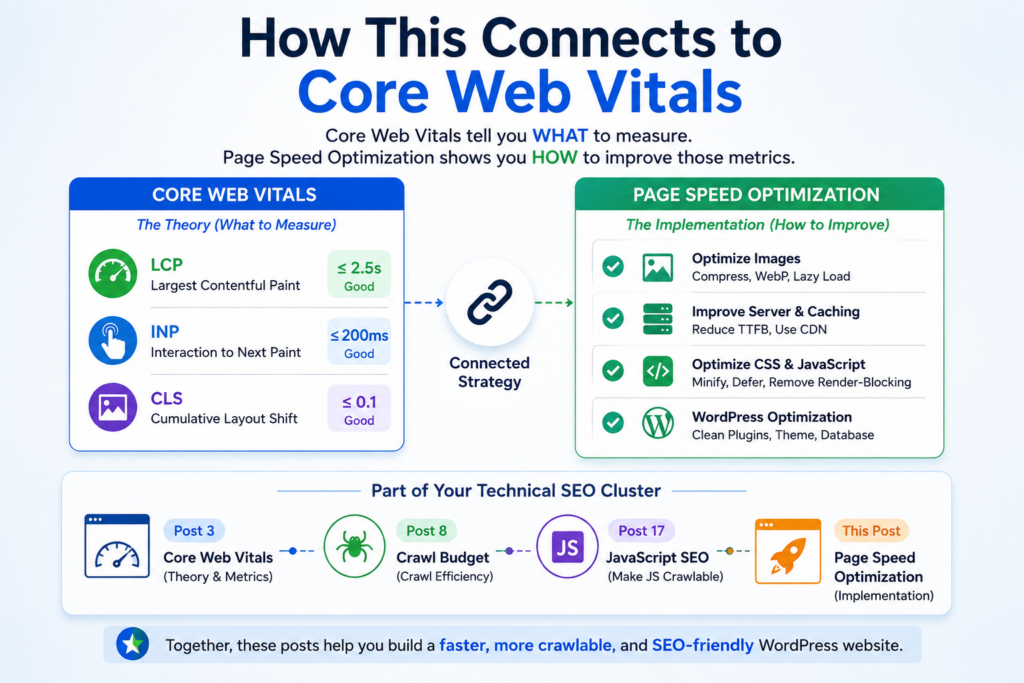
Page speed optimization explains what you can actually change.
If you haven’t already, link this article to your Core Web Vitals 2026 post for those who want to learn more about LCP, INP and CLS.
You may also want to link to your technical SEO audit tools post for readers looking for a wider technical diagnosis workflow.
This also means that page speed is part of a larger technical SEO cluster that also includes:
- Core Web Vitals
- Crawl budget
- JavaScript SEO
- Page speed optimization
The articles answer different questions while supporting the same technical SEO topic.
Final Takeaway
The best way to page speed optimization WordPress SEO is not to install five performance plugins and set all settings to the maximum.
It’s a controlled process.
Measure >> diagnose >> fix the biggest problem >> test >> monitor.
Begin with images and caching, as these are often available to non-developers. Then check CSS, JavaScript, plugins, themes and server speed. If the issue requires changes at the server level, ask your hosting provider rather than make risky changes yourself.
And most importantly, don’t mistake a perfect PageSpeed score for a perfect website.
A fast website is one that quickly loads its important content, responds to user interactions, has visual stability and performs well on real devices.
That’s the standard I’d be optimizing for in 2026.
FAQ
Does page speed directly improve SEO rankings?
Page speed and Core Web Vitals are part of Google’s page experience factors, but they are not a ranking shortcut on their own. Google states good Core Web Vitals are a good indicator of Search success and overall user experience, but many other signals are included in more broad ranking systems.
The aim should therefore be to improve performance without sacrificing the quality of content, accessibility or usability.
What is the best WordPress plugin for page speed?
There’s no one-size-fits-all plugin for every WordPress site.
If your hosting uses LiteSpeed, LiteSpeed Cache is a good place to start as it combines caching and several optimization features in one plugin.
WP Rocket is a good primary caching and optimization solution for non-LiteSpeed hosting. If your main performance plugin doesn’t already do the trick, ShortPixel or Imagify are good for image optimization.
The most important rule is not to have overlapping optimization systems.
Can page speed go from 40 to 90 in PageSpeed Insights?
Yes, it can, but there is no guarantee.
How much better it is depends on what made the score bad. A site with big images and no caching can improve a lot. A site constrained by slow hosting, heavy JavaScript or many third-party scripts may need much more work.
Fix the performance issues that are leading to the score instead of chasing a particular score.